Yes – you read me well; Haven’t you ever dreamed of being able to monitor which cars park in front of your home? Probably not, but let’s do it regardless – and build the system together using the convenience of the cloud.
Let’s have a look at the architecture
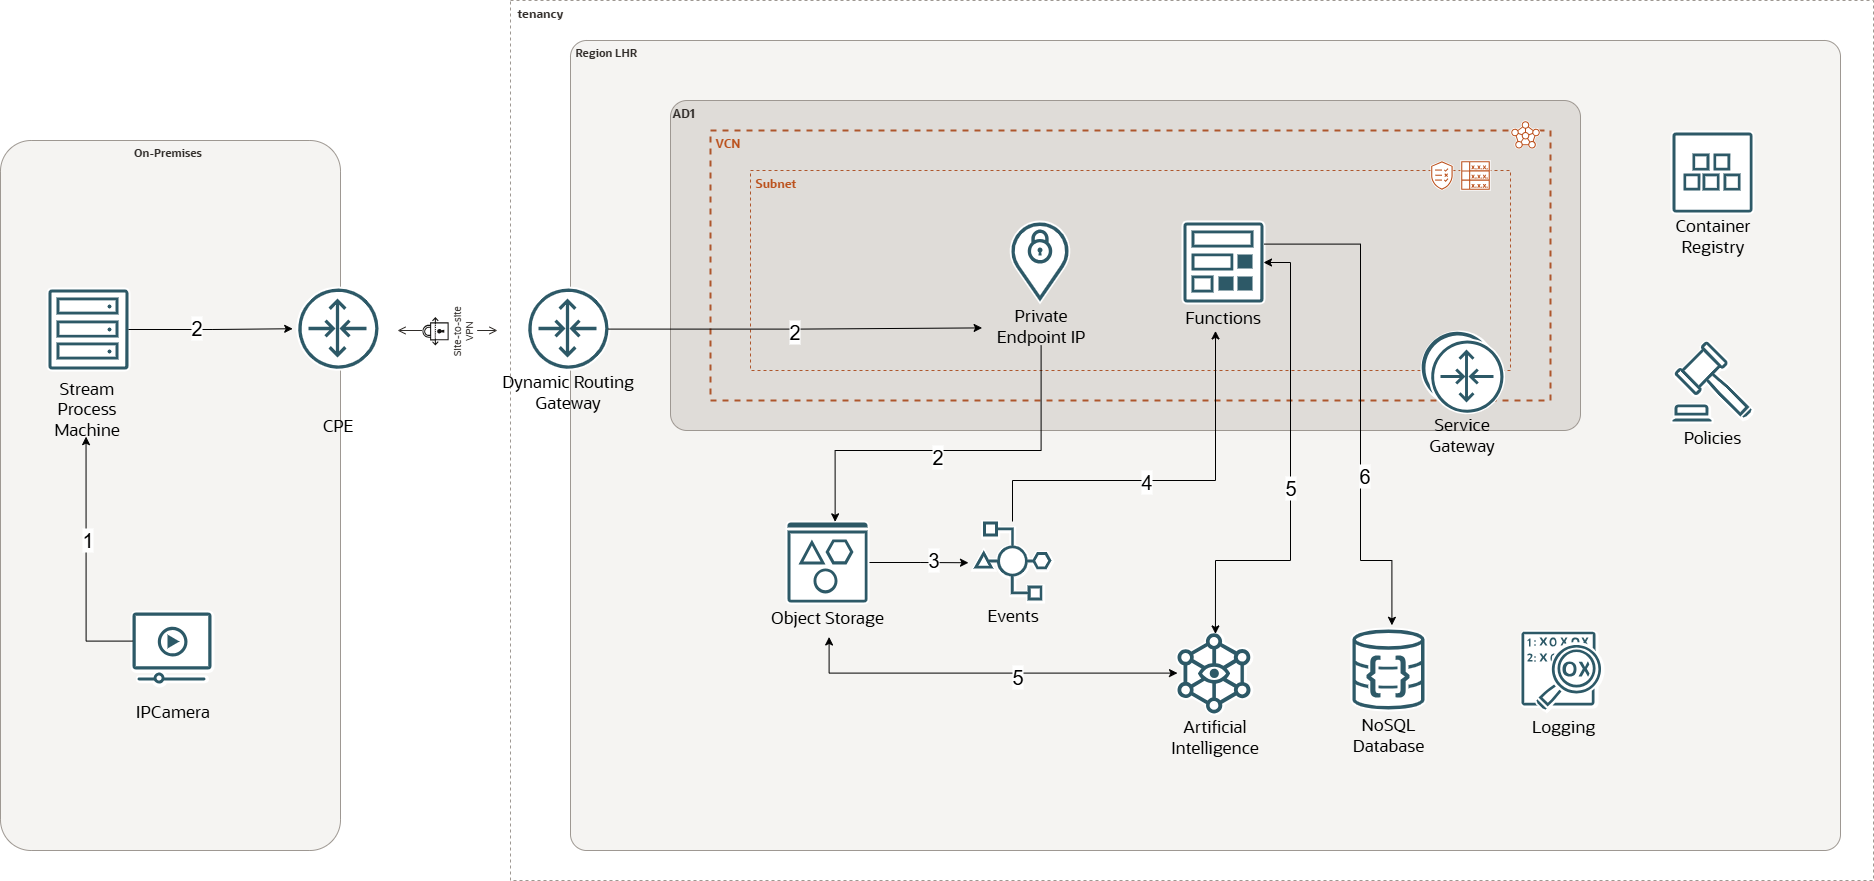
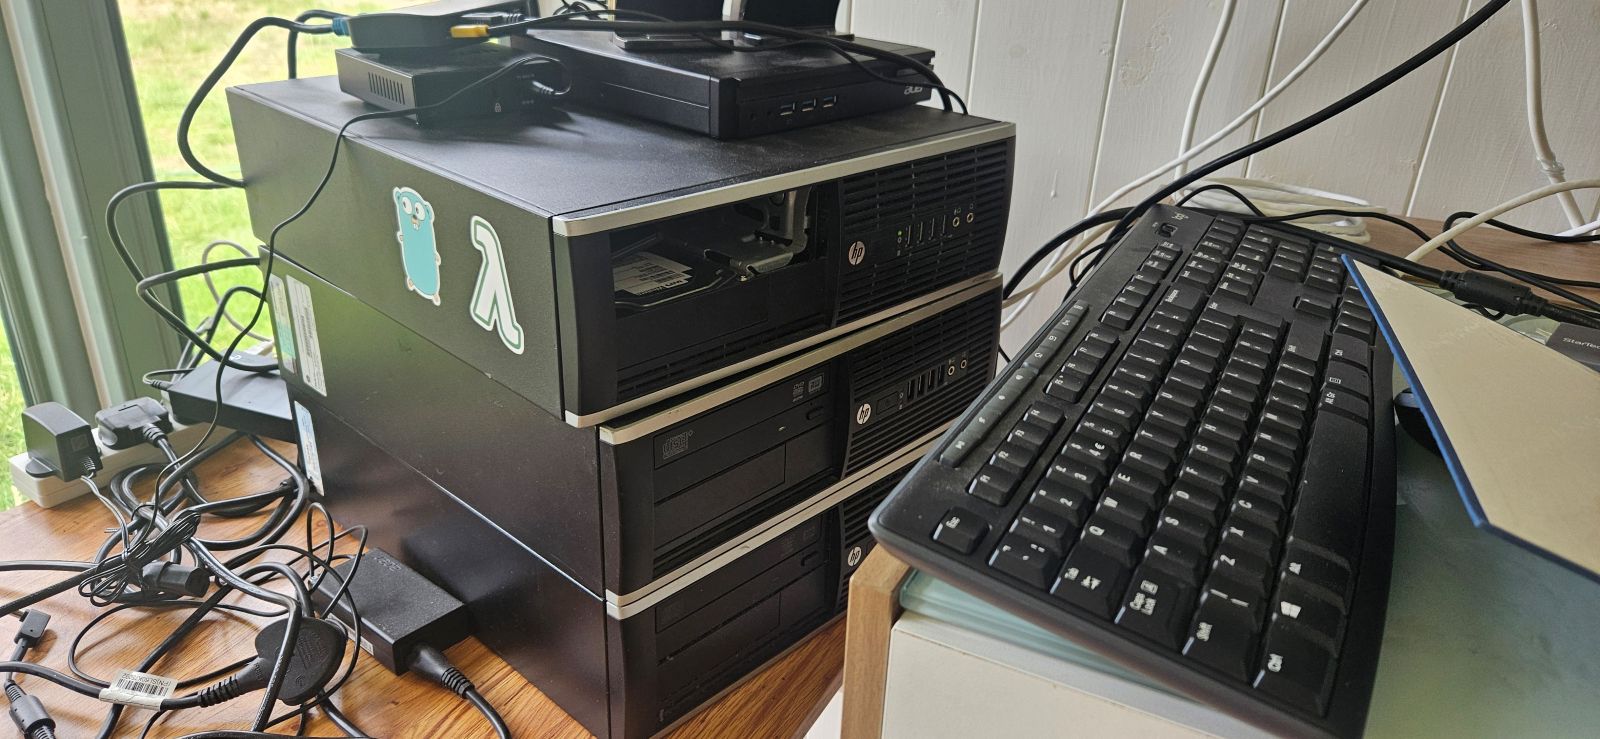
On the left you’ve got my home “on-prem” with a good old HP PC, a random IP Camera and my Cisco router. I share a couple of videos of my setup below – nothing too exiting 😉
⚠️ btw: This is a home lab experiment — not production-ready.
Tell me how and please share your thoughts in the comments.
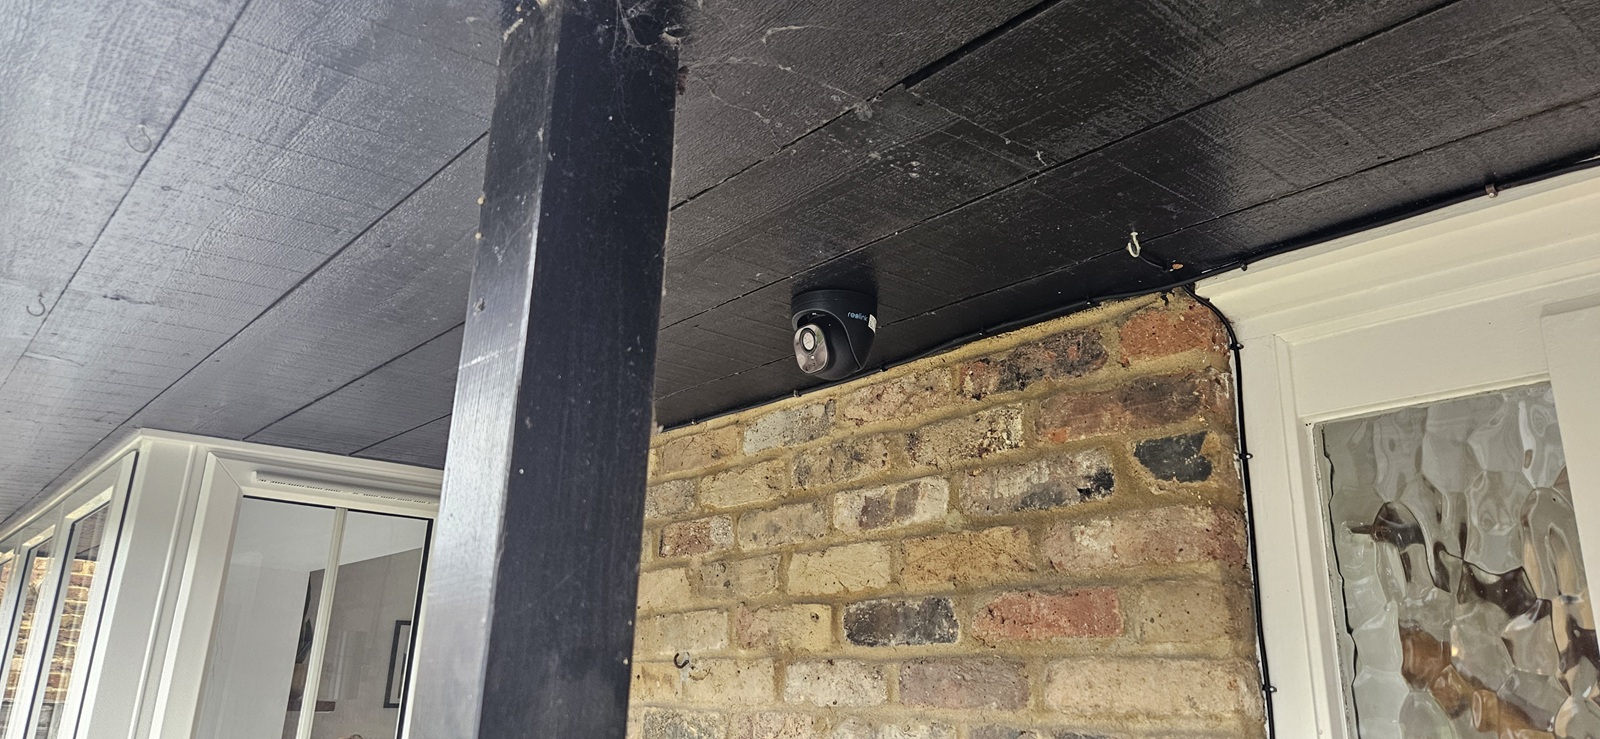
Right, first thing we do is to retrieve the video stream from the IP camera. There is a bit of fiddle with the firmware to assign an IP, launch the RTSP protocol and select the stream quality but it is not too challenging. Anyway this is out of topic and I won’t describe that in this article.
Now let’s go to the HP computer, the “Stream process machine” on debian 12, and write this python script below
import cv2
import os
from datetime import datetime

cap = cv2.VideoCapture("rtsp://usr:passwd@192.168.1.200:554/h264Preview_01_main")
w = cap.get(cv2.CAP_PROP_FRAME_WIDTH)
h = cap.get(cv2.CAP_PROP_FRAME_HEIGHT)
fps = cap.get(cv2.CAP_PROP_FPS)

print(f"Resolution:{w}x{h}, FPS: {fps}")

saved_frame_count = 0
frame_count = 0
success,image= cap.read()

while success:
    if frame_count % 2 == 0:
        ts = datetime.now().strftime("%Y%m%d_%H%M%S")
        filename= f"frame_{ts}.jpg"
        cv2.imwrite(f"/home/guillaume/ram_videos/{filename}", image)
        print(f"Saved a new frame '{filename}' (# {saved_frame_count} ), Success={success}")
        saved_frame_count +=1


    frame_count += 1
    success,image = cap.read()

cap.release()
cv2.destroyAllWindows()
We use the cv2 library to capture and process the stream, we take one frame per second and save it into a folder cv2.imwrite(f”/home/guillaume/ram_videos/ which is btw a folder mounted in memory with tmpfs; Earlier I did save the pictures straight on my HDD but my computer would lag badly (likely the OS gets overwhelmed with IO)
We’ve got our pictures saved and added continuously to the RAM folder; now we want to flush them every 60 seconds from RAM to HDD, so we’ve got another script, this time using bash moving the files across like so
#!/bin/bash
RAM_DIR=/home/guillaume/ram_videos
HDD_DIR=/home/guillaume/videos

if [[ -d "$RAM_DIR" && -d "$HDD_DIR" ]];then
	echo " Source and target folder exist. OK."
else
	echo "Error: One or both folders are missing, please check."
	exit 1
fi


while true; do
	file_count=$(ls -1 "$RAM_DIR" | wc -l)
	if [ "$file_count" -ge 60 ]; then
		echo "$(date): Copying $file_count files to HDD at $HDD_DIR from $RAM_DIR..."

		for f in "$RAM_DIR"/*; do
			cp "$f" "$HDD_DIR"/ && rm "$f"
		done

		echo "Done."

	fi
	sleep 20
done
Next we are going to send the HDD videos to OCI via our VPN tunnel using the object storage private endpoint using an infinite loop, again using another bash script. Don’t forget to add the endpoint to the /etc/hosts file so the requests goes via your VPN and not via Internet. For a lab internet would be OK though, I have got another article here that explains how to set-up a VPN connection between On-prem and OCI.
#!/bin/bash
HDD_DIR=/home/guillaume/videos

while true; do
	if [ -n "$(find "$HDD_DIR" -maxdepth 1 -type f)" ]; then

		for f in "$HDD_DIR"/*; do
			oci os object put --bucket-name lab_videos --file "$f" --endpoint https://<your-private-endpoint-dns-prefix>-<your-namespace>.private.objectstorage.<region>.oci.customer-oci.com
			if [ $? -eq 0 ]; then
				echo "Uploaded: $f"
			else
				echo "Failed to upload $f to OCI"
			fi
		done
		echo "Done uploading to OCI."
	fi
	sleep 10
done
I run the three scripts in parallel like below; the python script handling the video stream is on the top left, the bash copy from RAM to HDD is top right and the bash copy from HDD to OCI is bottom left.
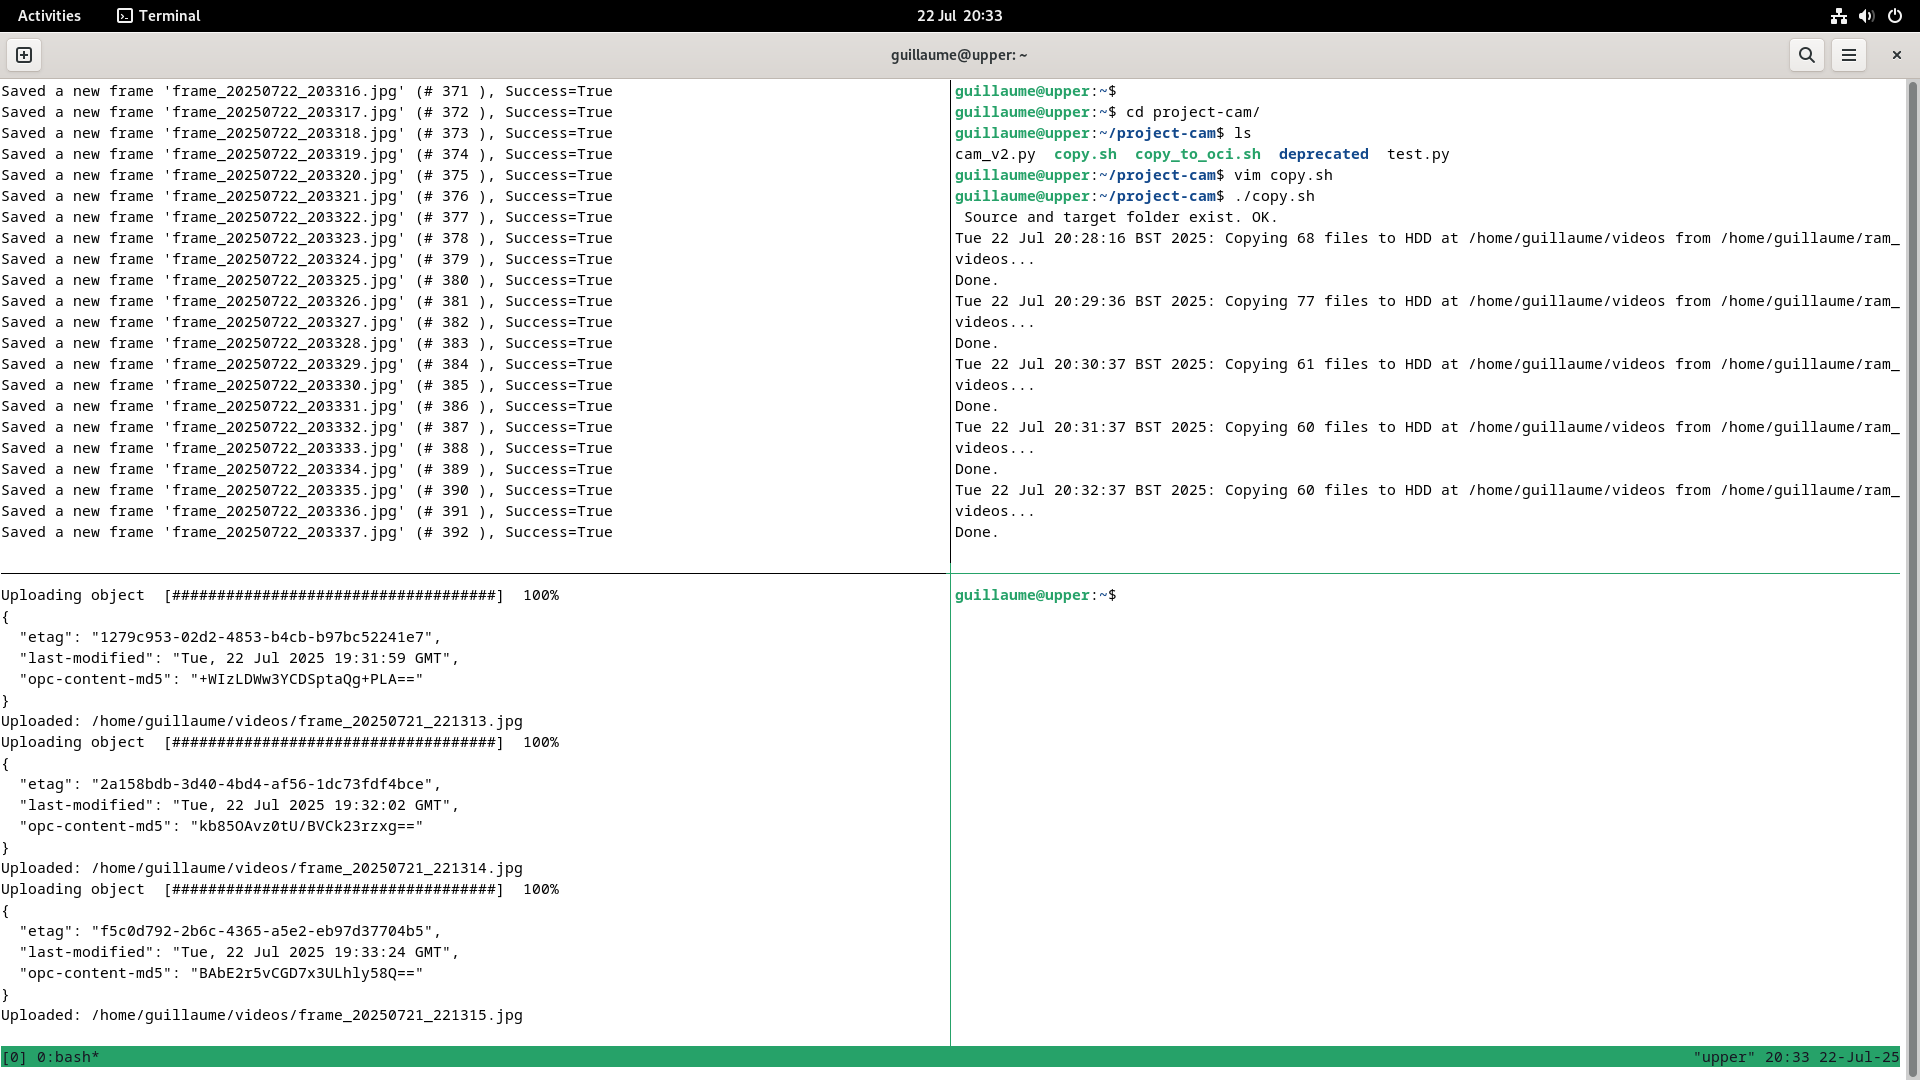
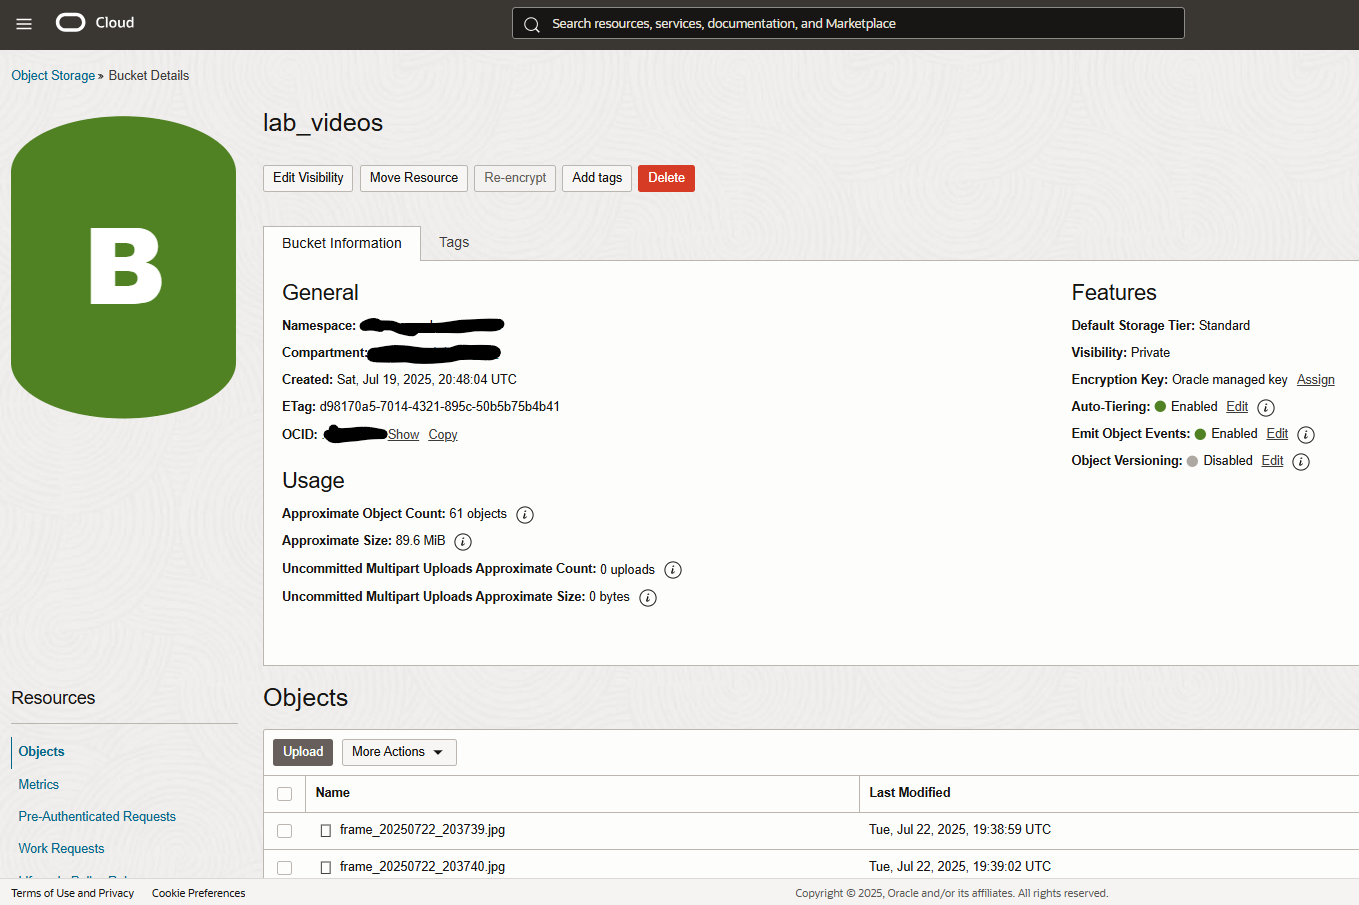
We are now done with our on-premise set-up, our computer is sending out a picture/second out to OCI object storage in a bucket called lab_videos; in case you’ve missed it it is written in the code above.
Let’s look at the right hand side part of the architecture, the “cloud” side. See the bucket getting tons of frames in; we have turned “Emit Object Events” on.
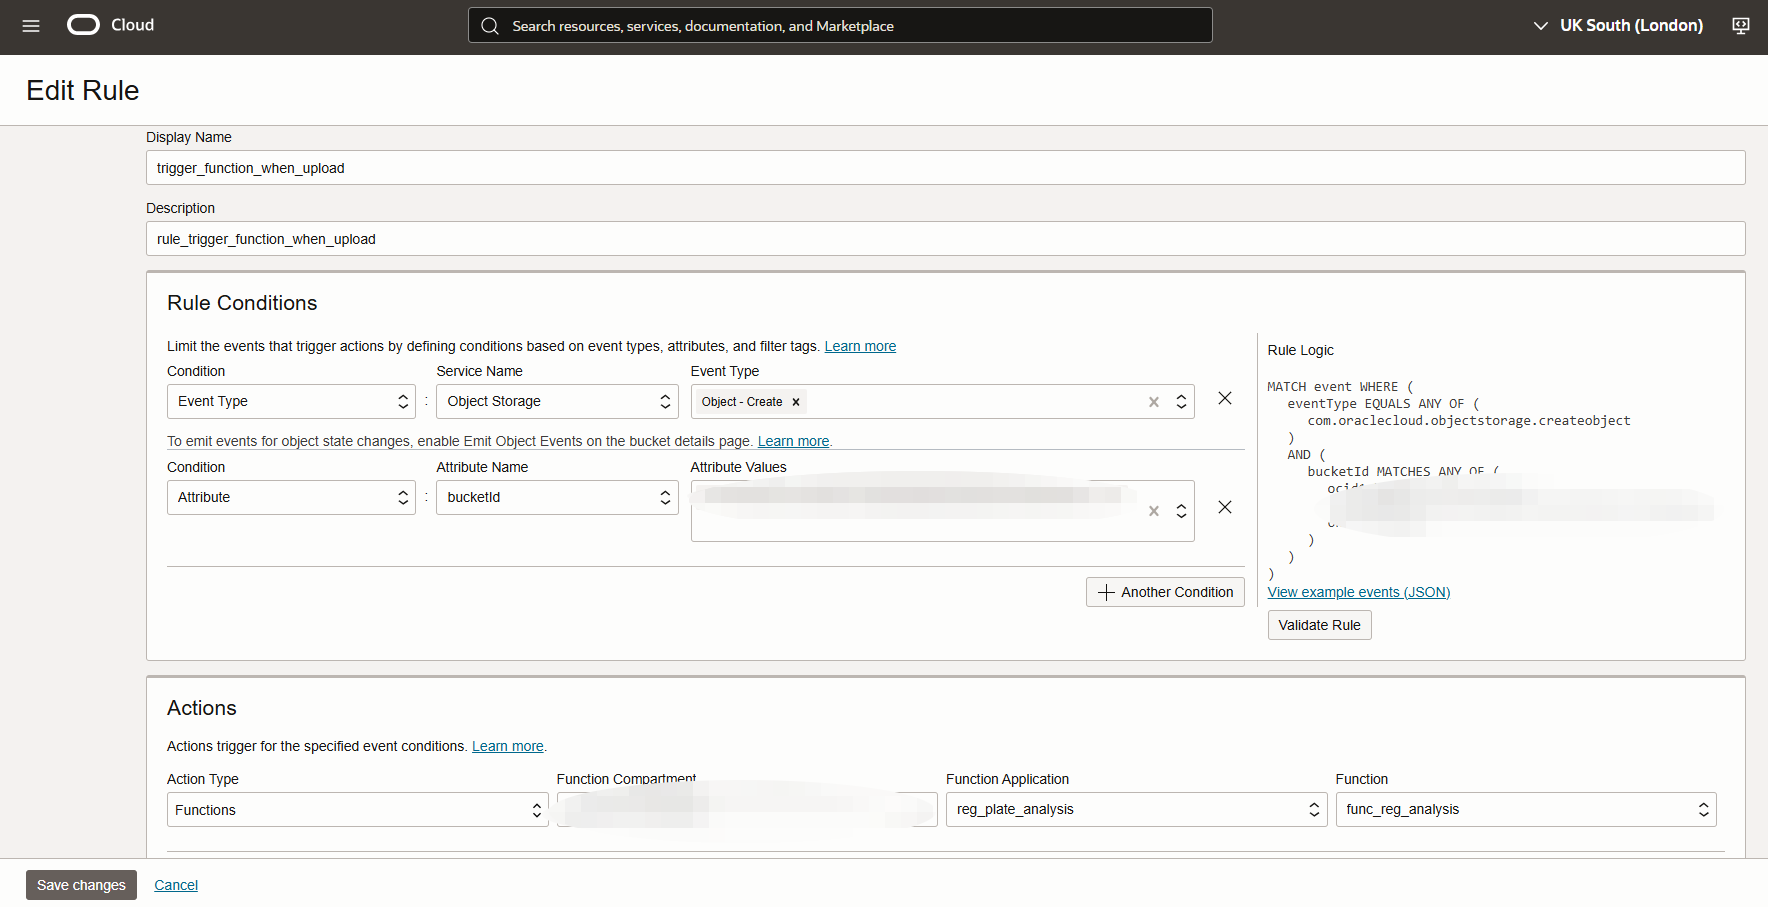
OCI Events needs to react to any file uploaded to the bucket, that’s why we have “Emit Object Events” in a way that it needs to trigger our future function based on a rule
Let’s now look at the function that processes a frame, detects the number plates as soon as a frame is added to my bucket, and then stores it in a database. That was the most challenging part, as it requires a bit of reading through the OCI Python SDK https://docs.oracle.com/en-us/iaas/tools/python/2.155.2/index.html and a tiny bit of programming experience – our best friend LLM comes in super handy indeed… the code is in my github here. Beware that the function is made of 3 files func.py, func.yaml and requirements.txt; if you are familiar with how docker works you probably know that already.
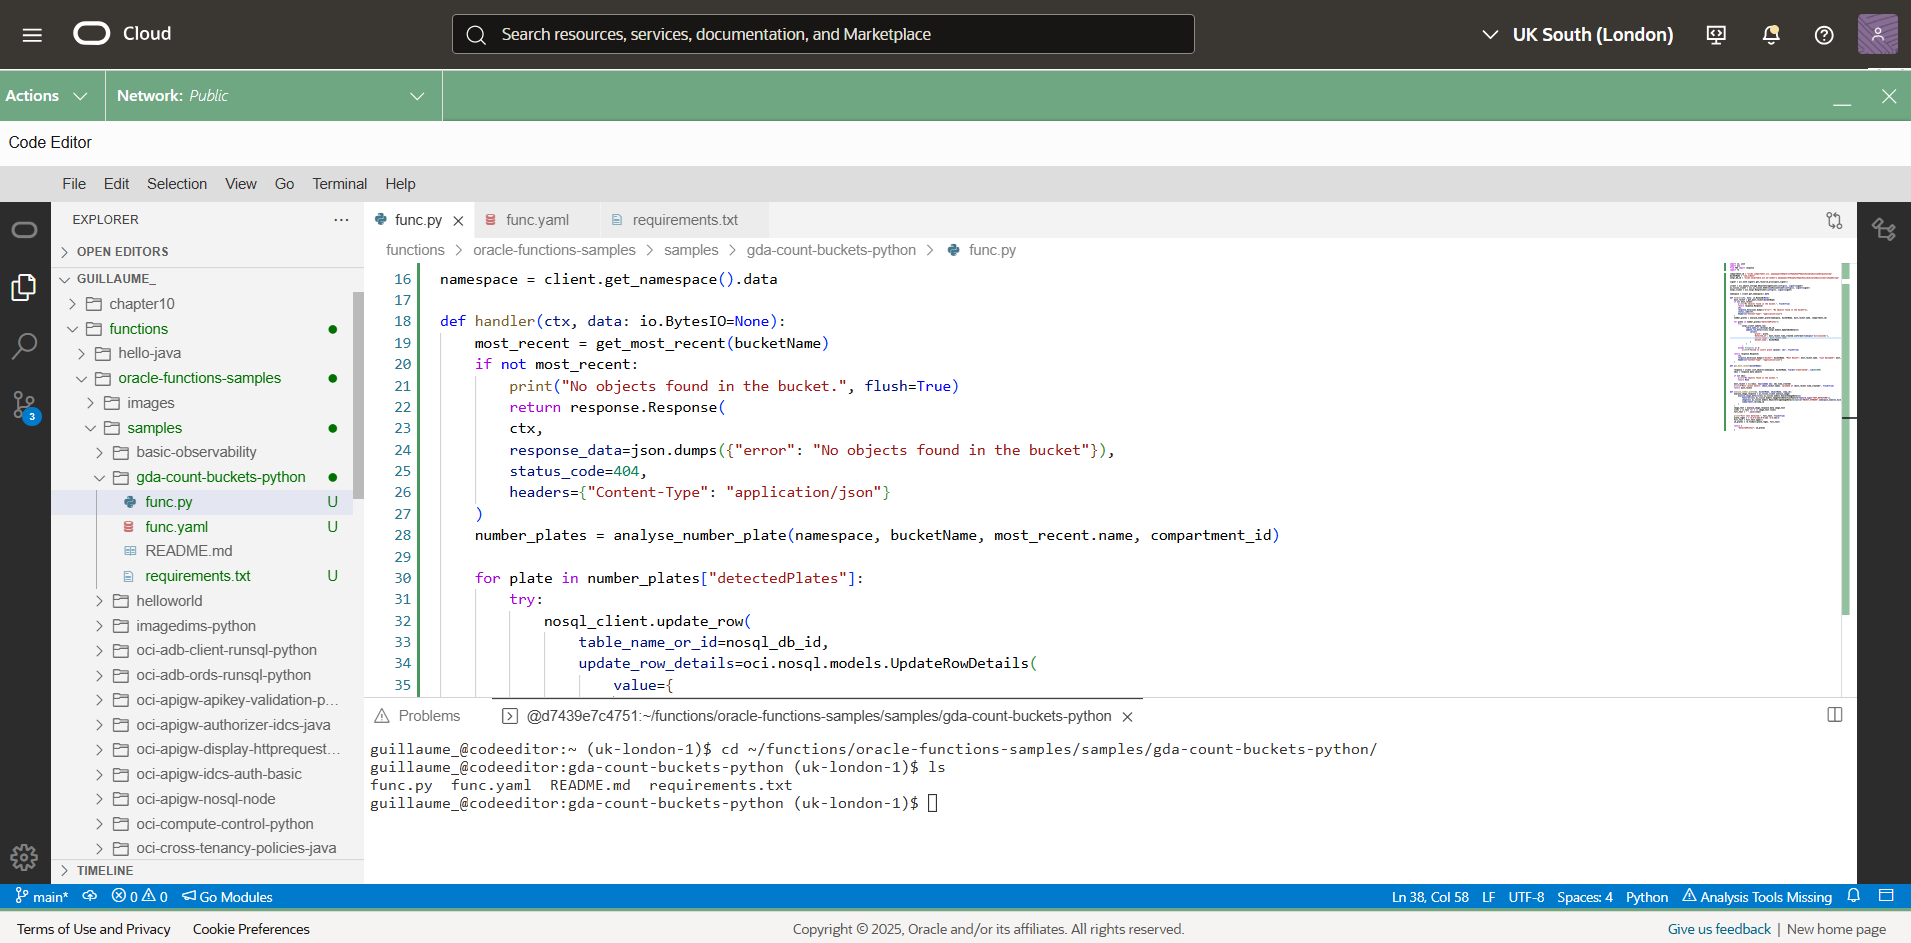
What we want to do then is to package this function and to push it into OCI function – I use the OCI cloud editor for this, which gives me a combo of coding environment and a cloud shell, it is handy so I don’t have to work locally, see below
Once your function is ready and has been deployed, it will now appear under Applications in OCI Functions – and for your function to be able to call on other services e.g. to pick up a file in object storage, AI vision to analyse a frame and NoSQL to write a new record in you need to give it the correct policies to the respective services – this procedure is called instance principal ; Because this is a lab, I give it an over permissive policy.
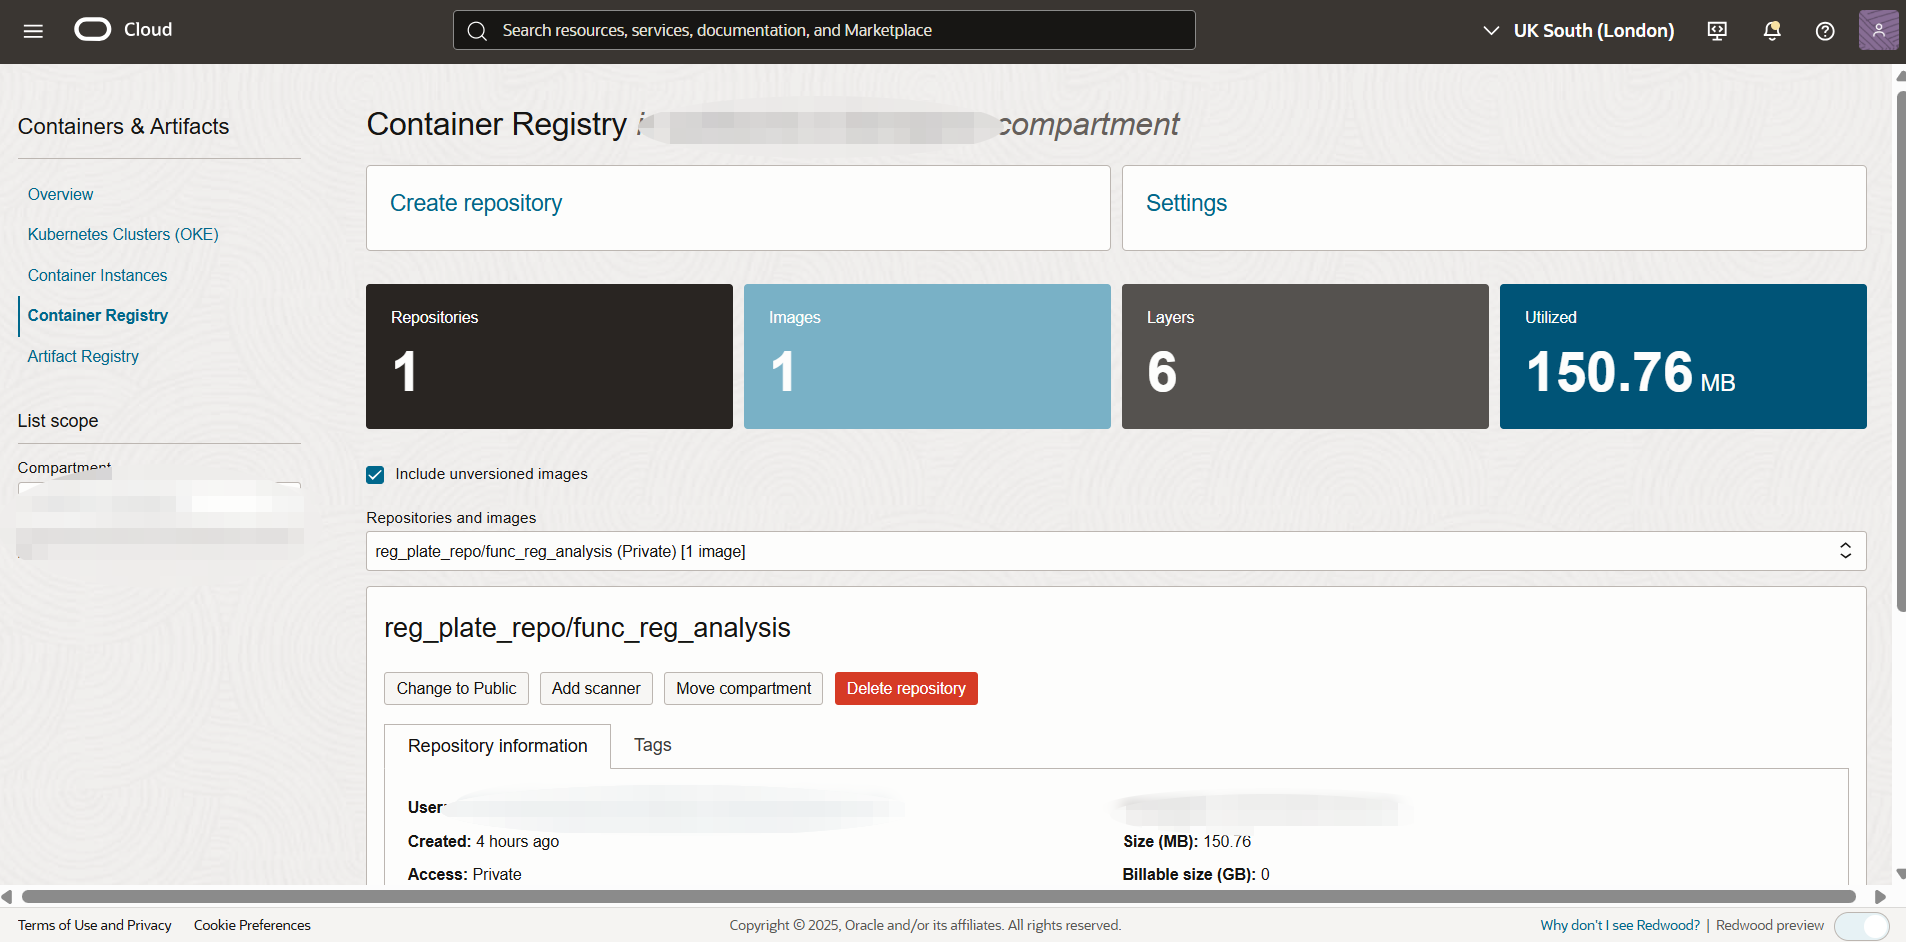
allow dynamic-group function-reg-plate to manage all-resources in tenancyYour function is now in Applications and OCIR, we see the first calls coming in, and its image being stored in the Oracle Image Registry.
Now let’s have a look, if I go on the AI vision console and put the URI of an image stored my bucket manually what type of answer do I get?
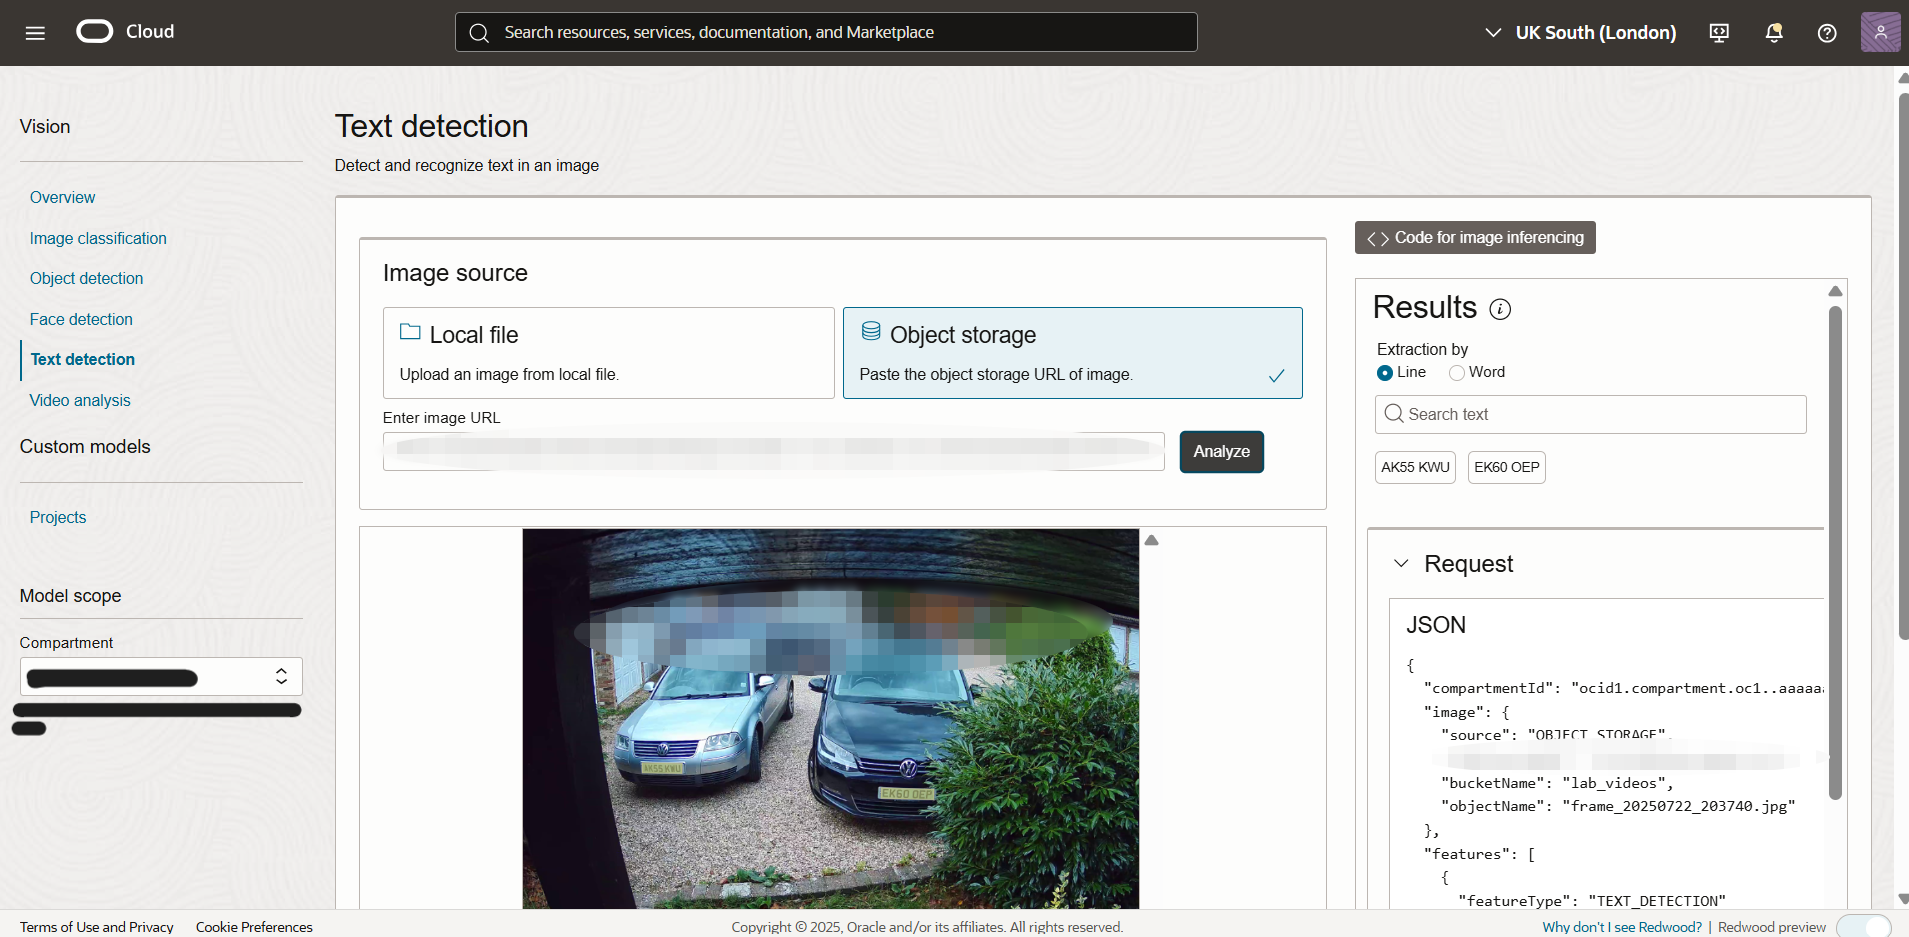
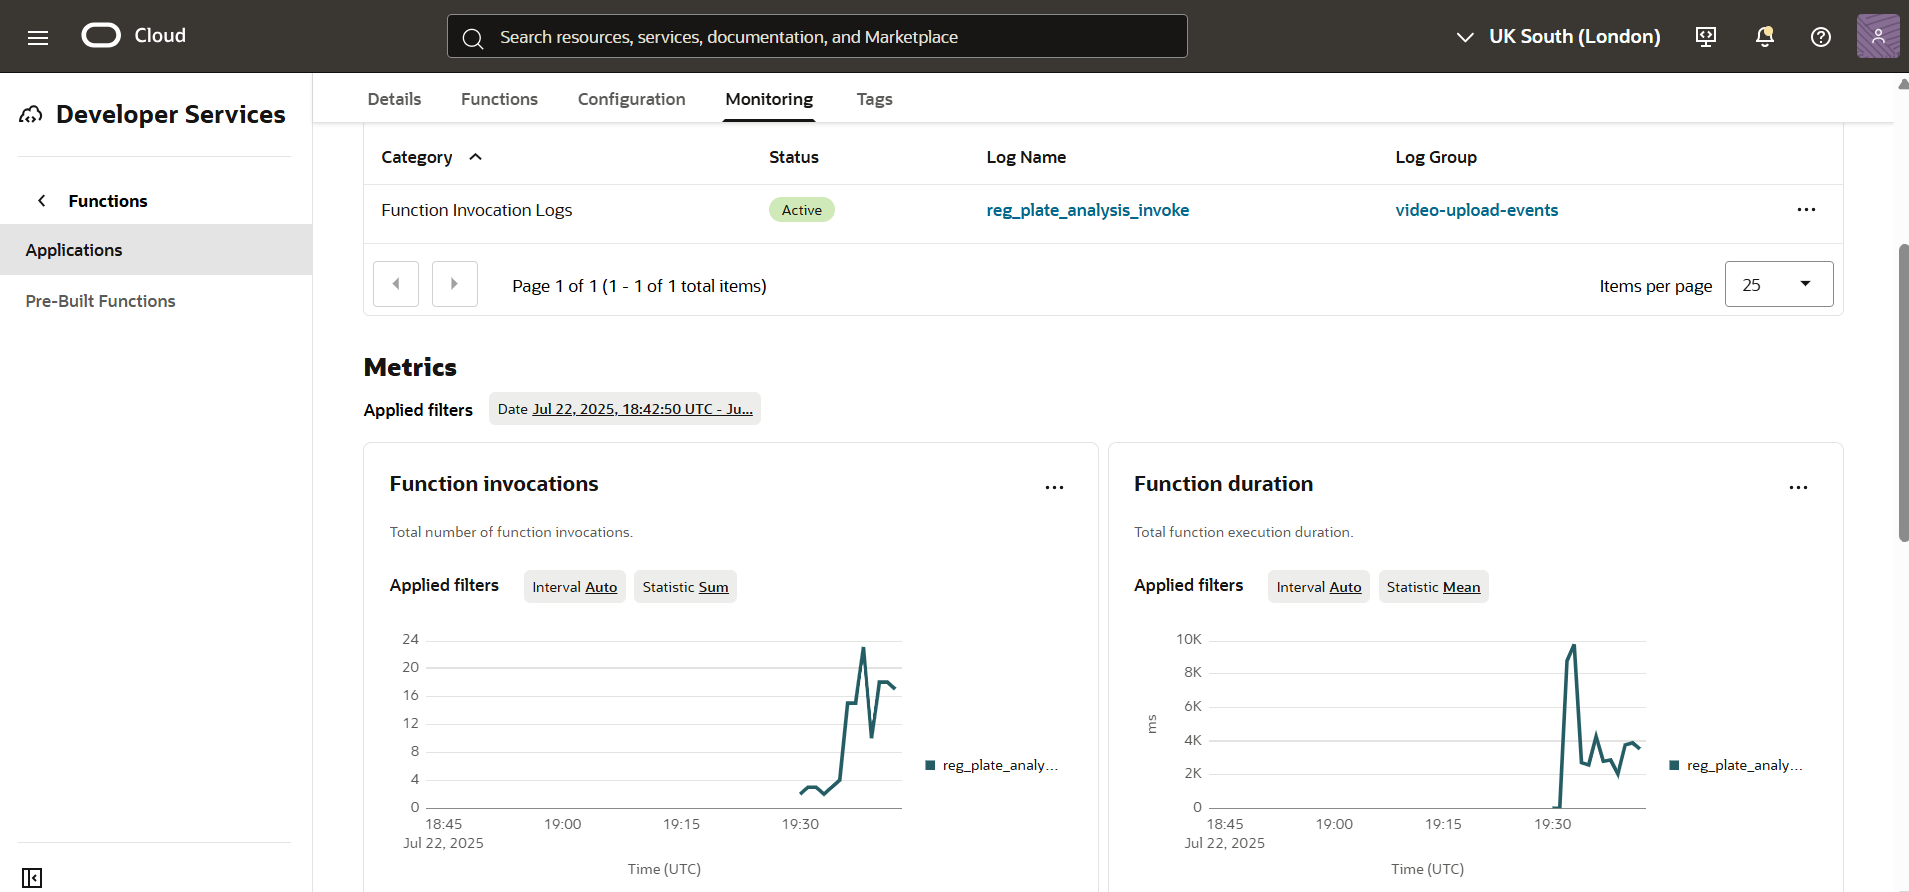
I would see these two number plates. (These are my vehicles, so no need to get too exited.) Let’s see if my function is able to catch then automatically, let’s look at the logs my function is producing.
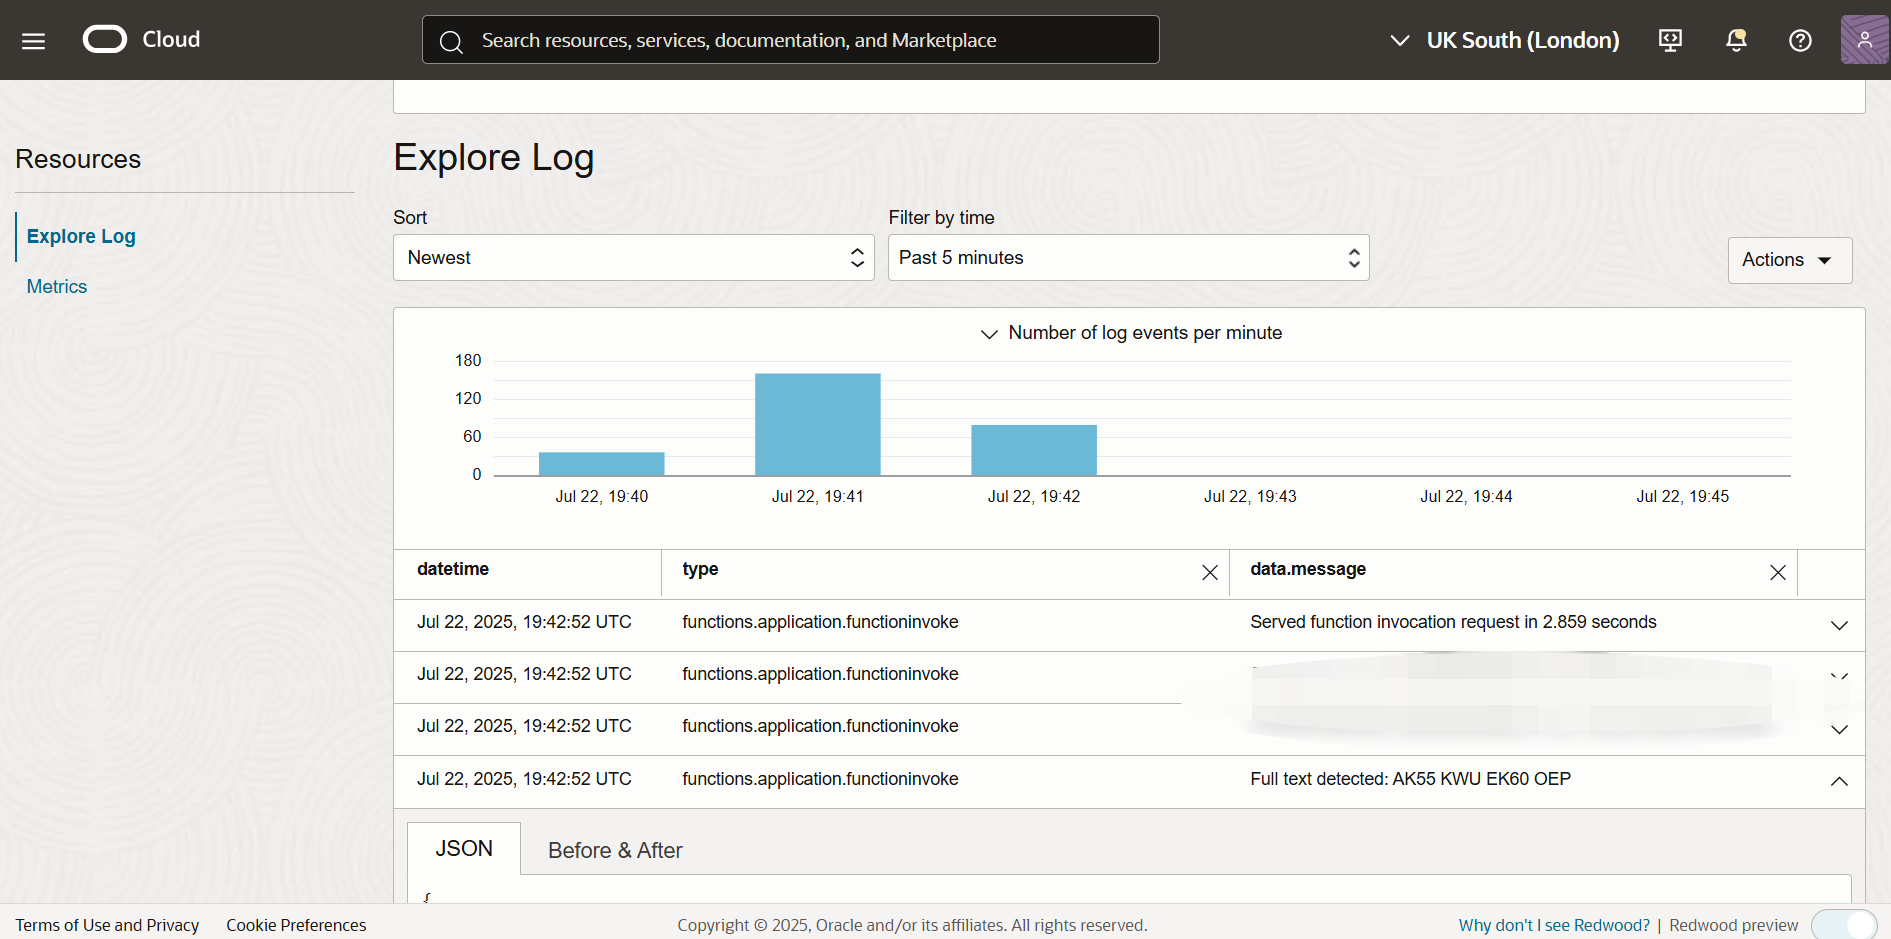
Yes, they appear! It means my function works and it is all automated; and by the way there is a very convenient way for your print in Python to show in OCI Logging is to add flush=True, you can have a look at my code again.
Now let’s look at the final step; do I have the timestamp and the details of the vehicules driving in? Let’s open the database records..
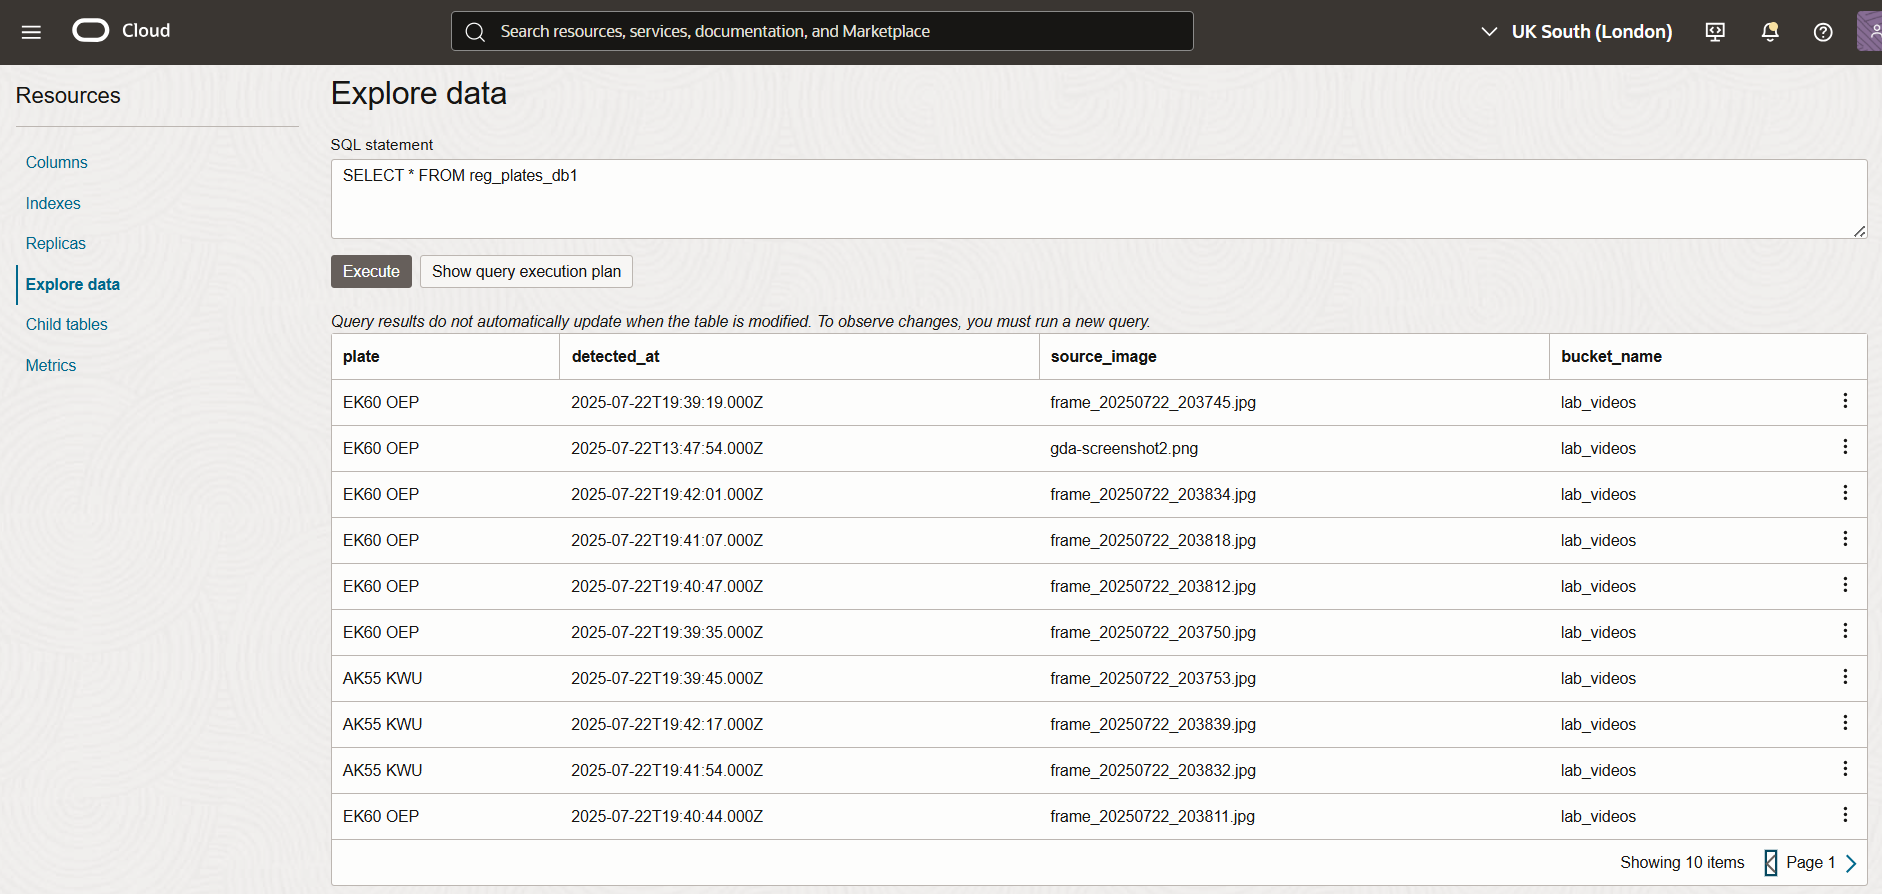
Boom! It works; we now have a complete Automatic Number Plate Recognition record system at home for absolutely no reason whatsoever! What I like is the convenience and the ease of use, as it give us so much power to come up with quick solutions.
Looking forward we could imagine a way to send out automated SMS or emails out to the owners, as long as we have the owners data indeed, in this case myself 😉 and also add some logic to allow parking per blocks of 8 hours, so we don’t insert a record in the database everytime a frame is uploaded… But in the meantime this is the end of this article so see you next time!