Everyone’s talking about “Agentic AI,” so I decided to experiment. My goal: a custom agent that can leverage my data and tools, set up quickly in the cloud using OCI.
Let’s imagine we want it to be a boss at calculus and we don’t want the agent and its embedded LLM to do it – because we know this is something they are (were?) bad at – We want to subcontract the “maths” to a “tool” so the LLM could decide to call on it autonomously if required.
Disclaimer: This guide is for demonstration only, I assume you have a good comprehension of the cloud & its setup, you know there is a cost involved and that I am not securing the APIs. You should always secure API in a production setting. I also trust that you know what you are doing about firewalls, VCN, subnets and the like. All of it is not the point here so I won’t address it.
Here is what we are going to do:
- Create a simple back-end with 4 random maths functions and APIs.
- Launch the back-end.
- Create an agent on my cloud console.
- Register a tool now part of the agent capabilities.
- Prompt and verify function calling by the agent.
Let’s go – Get your VM up, python, pip, venv, copy paste the code available in my repo and save the file.
Next, we want the APIs in our code to be reachable from the outside world via HTTPS. Install Caddy the super simple HTTPS reverse proxy, edit the caddy conf file at /etc/caddy/Caddyfile this way and start it up with systemctl. Caddy now reverse proxies to localhost:8000.
couincouin.click {
        root * /usr/share/caddy
        file_server
        reverse_proxy localhost:8000
}
Launch your python virtual env – if you are not sure more info here – and launch script.py. You should get something like that showing up in the terminal…
(back-end-env) ubuntu@instance-gpu:~/backend$ fastapi dev backend.py
[...]
server Server started at http://127.0.0.1:8000
server Documentation at http://127.0.0.1:8000/docs
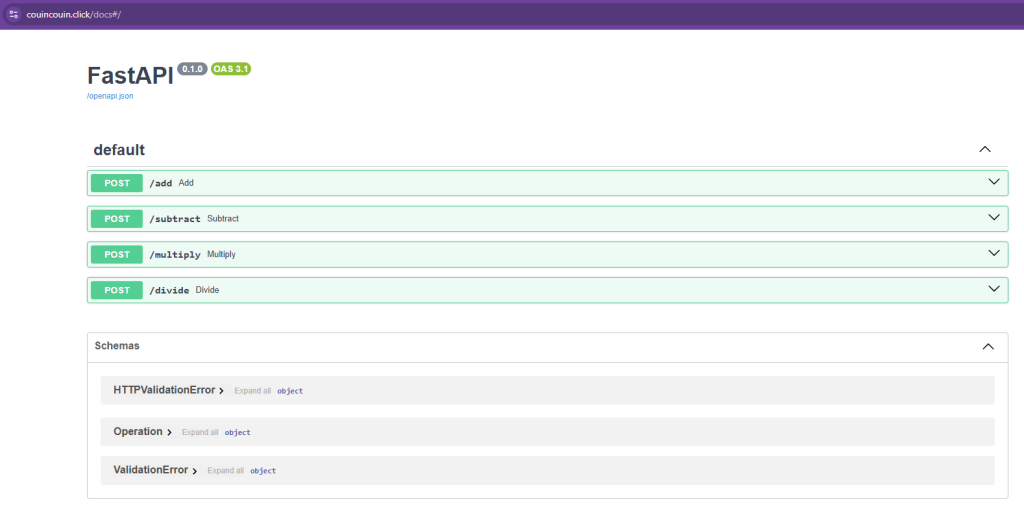
[...]Last step is to attach my VM public IP to my domain as a A record – I will tell you why later – I end up with 4 APIs:
- https://couincouin.click/add
- https://couincouin.click/subtract
- https://couincouin.click/multiply
- https://couincouin.click/divide
And we are done. Great, now let’s build the agent itself, shall we?
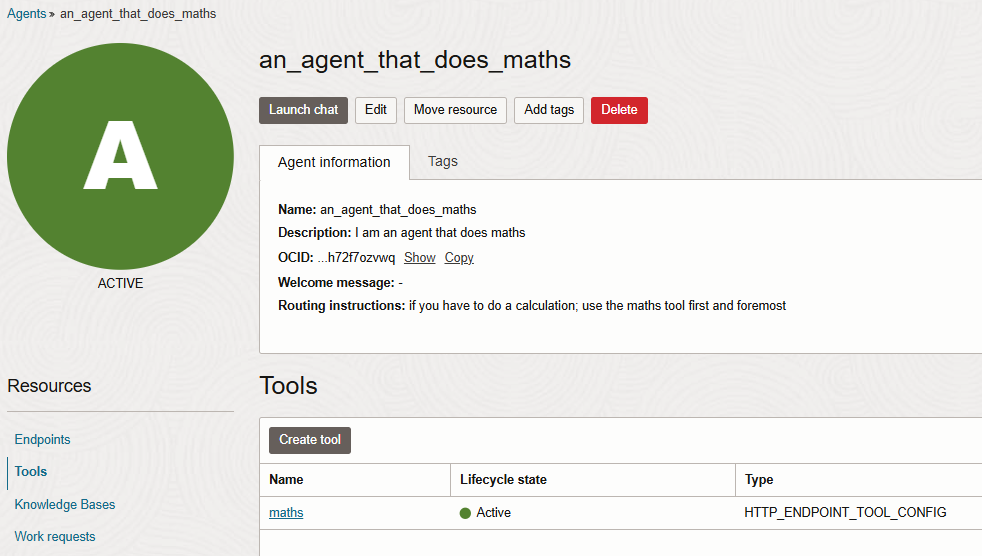
Go to OCI console > click on the hamburger menu > Analytics and AI > Generative AI agent > Agents and create Agent. Give it a name and enter a fit for purpose system prompt, in my example “if you have to do a calculation, use the maths tool first and foremost”. Then, on the second screen you can add tools as you can see below; it can be a RAG related knowledge base, to shoot SQL from natural language to a target DB, connect a custom app (what I am doing now) or connect another Agent – super slick no? Select custom tool.

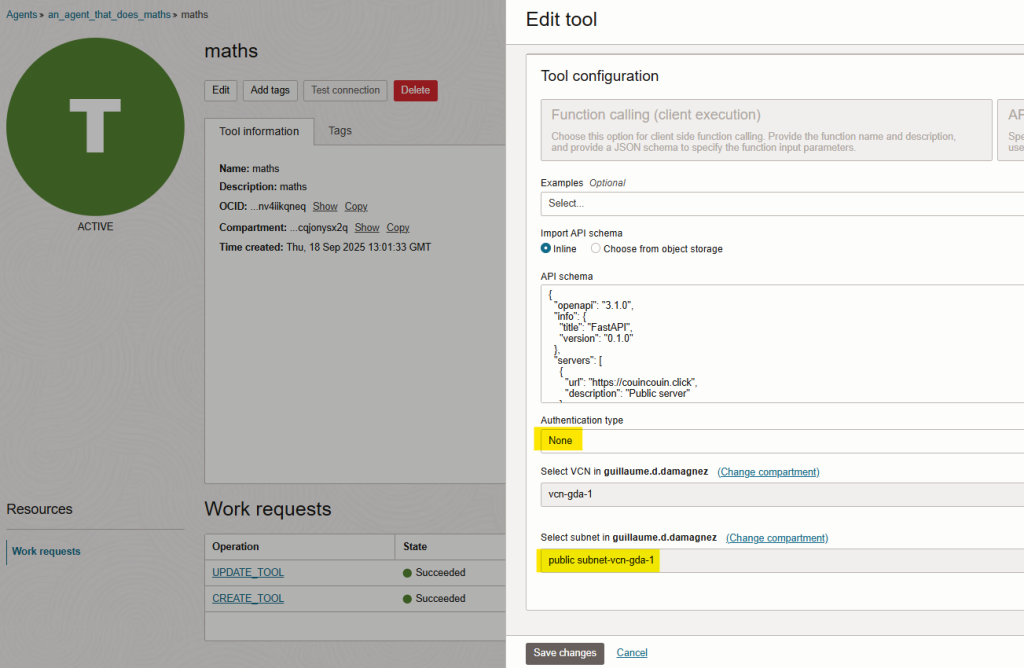
It will then ask you about how to reach out to your app’s API. Enter the OpenAPI format of your app , select None for Auth (in my case there’s none, but you make sure to secure your APIs in prod) and select a subnet you want the custom tool to shoot its request out from, highlighted in yellow below.
At that stage, here are gour gotchas in the plumbing that cost me time…
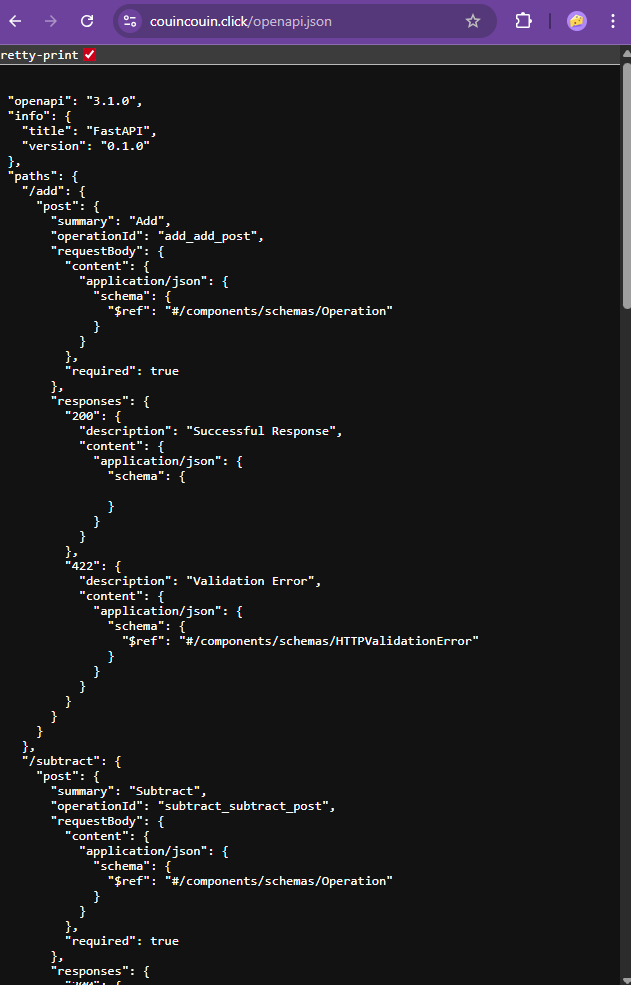
- I’ve exported the OpenAPI format from couincouin.click/openapi.json; it was 99% accurate but I had to add my domain to it wit the “servers” directive.
- It needs a domain, an IP address does not work. (for my setup at least)
- The public subnet you are tying the agent tool with needs to access the internet via a NAT gateway, not an Internet gateway.
- Endpoint needs to be HTTPS, not HTTP hence the use of caddy ealier.
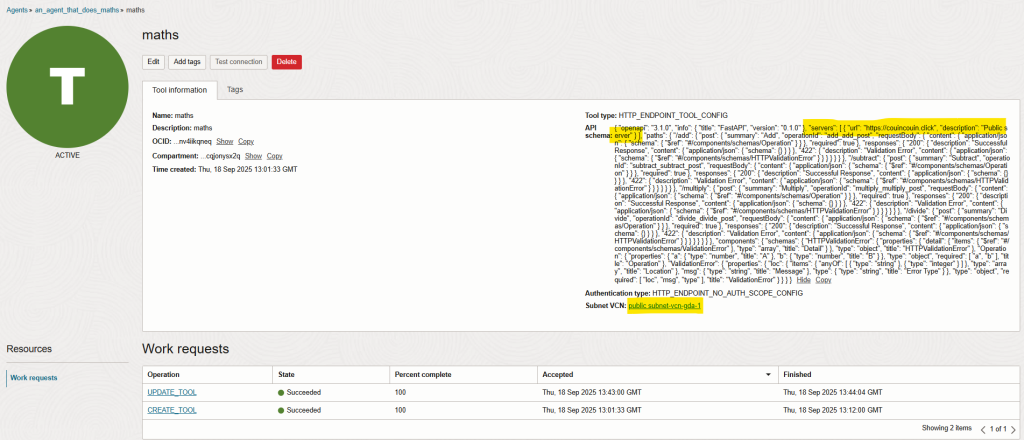
Below the API format in purple you’d copy paste from your app and then the “maths” tool description with its subnet and the copy paste plus the “servers” directive.
Wonderful! Now we end up with a fully functional agent, it is an agent that does calculus and it has a list of tools at its disposal, in my case only one, but could be hundreds, see below:
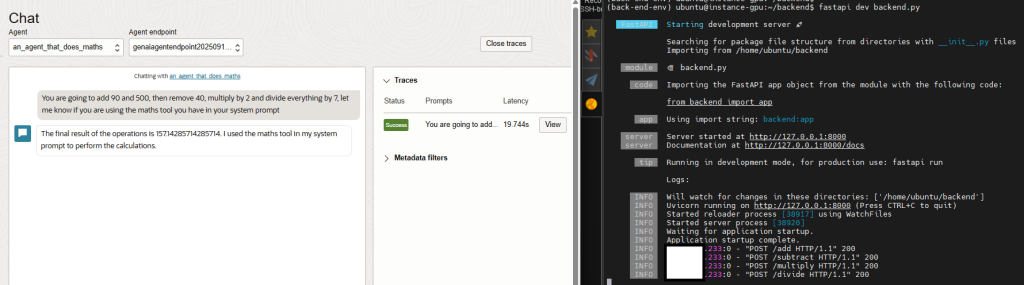
Let’s try it out! I ask a question to it on the left, please see below, and if it plans to use a tool – And it does! We see the server on the right receiving 4 request for add, subtract, multiply and divide in real-time.
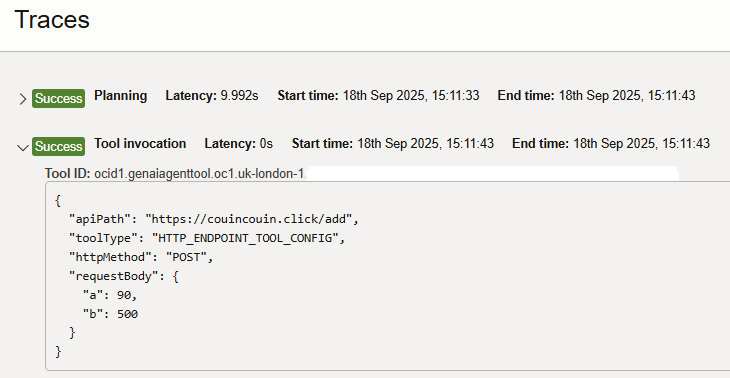
If you are still unsure I am showing you the trace for the first call below
And that’s it – we’ve shown end-to-end how to set up a cloud agent that can call our own tools, tailored to our needs. Now imagine the possibilities when a personal agent has access to hundreds of tools!
As a next step, we could also code the agent ourselves on our own VM or container using Ollama and the ollama library – but its enough for now – see you later.